If not, you should. Not only will it save you some $$$, you get a great sense of accomplishment from a job well done. Even if you’re not handy with a wrench or don’t have a ton of tools there are some simple, routine maintenance items you can do in your Porsche without going to school to be a Porsche tech. What type of DIY maintenance projects have you tackled on your Porsche?
Changing the Spark Plugs in Our Porsche Cayenne
One such project we decided to tackle is changing the plugs in our Porsche Cayenne. While changing the plugs in our 993 can be a bit of a challenge (think dropping the motor), doing so in a 2009 Cayenne V6 is a breeze. This was our first plug change on the Cayenne and it took less than 60 minutes. On a scale of 1 to 10, with 10 being the hardest, I would put this at a 2. The only reason it’s that high, is that it can be a chore to remove the coils, but this only takes patience and a bit of leverage. Here’s a brief tutorial for any of you that might want to do so yourself.
Parts and Tools Needed
– 1 Socket wrench and at least a 9″ extension (we connected up a 3″ and a 6″ to reach the deep plugs)
– 1 5/8″ spark plug socket (make sure it has the little rubber grabber installed)
– 1 Porsche mystery tool found in your Cayenne tool kit
– 1 longish flat head screwdriver or some other implement to remove coils (more on this later)
– 1 Flashlight or shop light (optional)
Parts Required
No two plugs per cylinder here. Just purchase six pre-gapped plugs from your favorite Porsche parts house and you’re good to go. We purchased our set six of genuine Porsche plugs for $89.94 from Suncoast.
The Process for Changing Spark Plugs in your Porsche Cayenne
Depending on your garage, experience, equipment, etc. you may want to amend these instructions slightly to fit your specific needs. Bottom line, it’s a fairly easy project and you simply need to be sure not to damage the plug wire clips as they are a bit fragile. Unfortunately, we learned this the hard way. The good news is a local dealer had a replacement piece in stock and it was only $18 bucks. We’ll give more detail on this at the end of the post.
1. Open the hood.
2. Remove the front plastic engine cowling. This is the small plastic strip that runs horizontally across the motor and encompasses the oil cover cap. It simply un-clips with some light tugs on each side. You’ll need to remove your oil filler cap to get it completely off.
3. Once removed, you can see each of the plugs are placed squarely in the center of the manifold with the plug wire clipped to the top of the coil (remember the coils sit over the spark plugs in this engine design) via a black plastic snap on clip.
4. To remove the plug wire you’ll need the mystery tool we referenced in our tool list above. If for some reason you can’t find yours, you could easily fashion something out of a small piece of thick gauged wire or even a wire hanger (these can come in handy for other uses too).
5. Simply maneuver the tool so it’s under the clip (as in the picture above) and give a slight tug upward. This will disconnect the plug wire cap from the top of the coil and expose the coil. If you find any debris, like the leaf we found, be sure to remove it before taking out the coil and plug. You don’t want leaf litter or any other type of debris falling into the cylinder once that plug is out.
6. Now, remove the coil from the top of the plug. The hardest part about doing this is breaking the suction the coil has on the plug. Twists and turns help as do some good leverage with either your own strength or that of a screwdriver.
7. Once you have the coil out, you’ll need to place it out of the way and remove the spark plug using your ratchet and socket. Remember, you’re going to need that long extension as you get further back along the engine where the plugs are buried a bit deeper. We were going quickly, so we would just lie the coil along the manifold for easy access. If you’re worried about knocking it around, you might want to lay it on your work bench or on a cart. We don’t recommend putting them on the ground as you don’t want to get them dirty and you wouldn’t want to take a misstep and crush one underfoot. While they aren’t terribly expensive, it could still make for a much longer day.
8. Once the plug is removed, clean out around the plug hole to remove any small debris and then simply insert your new spark plug into your socket and screw it back in. Remember not to over-tighten. Now replace the coil (again make sure it is clean of any debris) and push down until it “pops” back on. Re-clip your spark plug wire to the connector and repeat the whole process five more times.
We had one problem
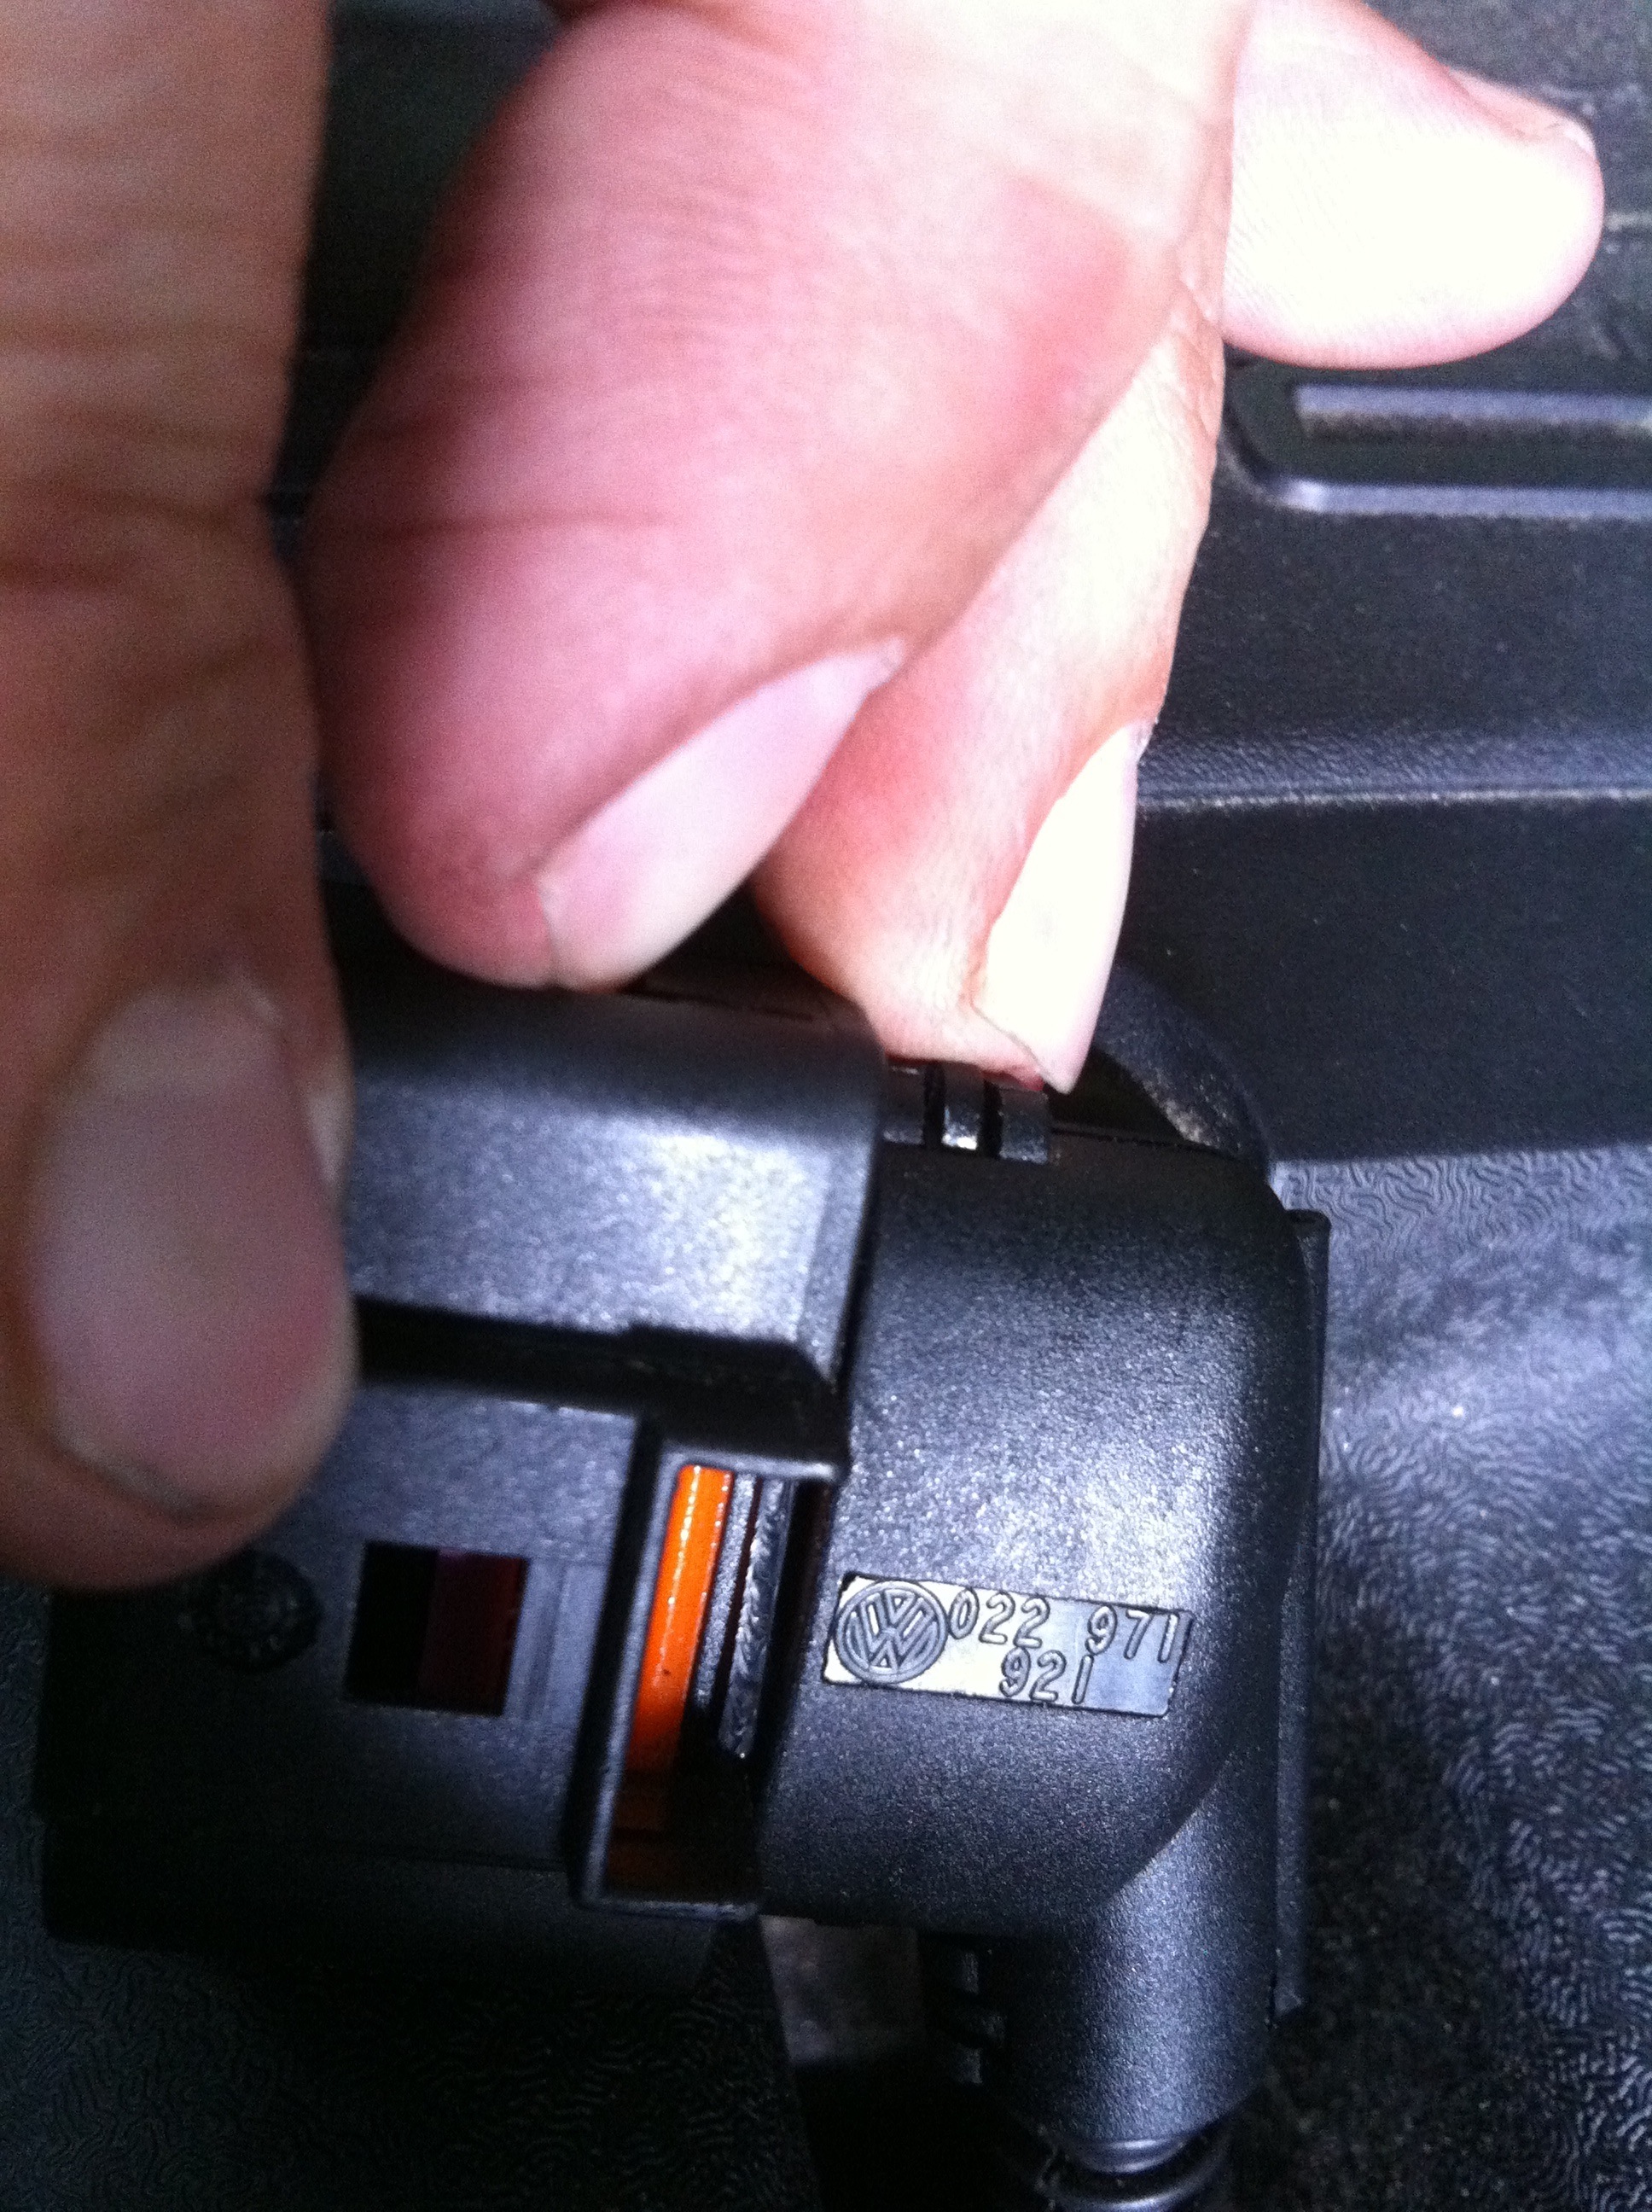
Even though we knew the plug wire clips were fragile, one of ours still broke during the removal process. Fortunately, the clip that attaches from the plug wire to the coil is actually two separate part numbers (see the picture above).
If you look closely at the picture above (click on it for a bigger version), you can see where ours broke if you look just to the left of the VW logo. That’s right, it’s a VW part too. In fact, our local Porsche dealer didn’t have one in stock, but thankfully Gary, the parts guy at Darling VW in Bangor Maine, did! It was a matter of seconds to re-attach it and we were good to go.
One DIY project on the Cayenne done. Next up is our post on how to replace the cabin filter and engine air filter in your Cayenne.
What type of DIY projects have you tackled on your Porsche?
Related Porsche Posts
Porsche 997 Weltmeister Front Strut Brace Installation
What’s the True Price of Deferring Maintenance on Your Porsche?
An Illuminating Back-up Plan
How to Wash, Polish, Wax and Detail your Porsche
Porsche Spring Start-up Tips
View Comments (15)
Dear Editor,
Good article on changing plugs, but...I think you may have omitted some important info.; i.e., torque setting for tightening plugs and recommended practice for applying anti-seize compound to plug threads before installation.
In reality, plug changing is only required every few (several?) years or so for most owners. You should have tackled a more frequently required project, like filter changes or oil changes.
Regards,
John Patterson
@John,
Good points all around. The items you mention above are very important. However, something to note. To the best of our knowledge (and we're not experts so we can't say for sure) but Porsche doesn't recommend anti-seize compound on plugs. They issued a technical bulletin Porsche Technical Bulletin 9102, Group 2 that is retroactive for all Porsches. You can see more about it in an excerpt from Wayne Dempsey's (CEO Pelican Parts) book at http://books.google.com/books?id=ogRFgBZMYvsC&pg=PA180&lpg=PA180&dq=Porsche+Technical+Bulletin+9102,+Group+2&source=bl&ots=oSm0FFD2cl&sig=nA4QpbYZJsNKsBr4g1I4pumyWgE&hl=en&ei=Z2b3Tar6KaXf0QHPtZiECw&sa=X&oi=book_result&ct=result&resnum=9&ved=0CFwQ6AEwCA#v=onepage&q=Porsche%20Technical%20Bulletin%209102%2C%20Group%202&f=false
As for more frequent projects, we agree. If you look at the last line of the post, the pollen filter is next as is the air filter. More to follow on other models too.
Thanks so much for reading and commenting. It is much appreciated.
You asked about DIY projects that your readers may have done. I did the transmission fluid replacement in my 1987 Carrera several years ago, replacing it with synthetic fluid. It was a straight forward project, needing only a pump to get the fluid into the opening. BIG change in the smoothness of the shifting. Consider this as another project to illustrate on the site.
My first Porsche was saying 1966 912 that I purchased in 1970. I did minor maintenance including oil and filter brake pads and valve adjustments. My next Porsche was a 1977 911 S purchased in 1978. I was afraid to do anything to that. In 1986 I bought a 1985 928S with 4000 miles. I found a 1958 speedster with the serial number that was fifth from the last one manufactured. In 2006 I found a 1963 – S90n in 2006 I found a 1963 356-S90. In 2005 I bought a Cayenne S. I have loved every Porsche and I have owned. The problem is I still own them and the maintenance on five Porsche's is killing me. I dearly wish that I could do the work myself. But I'm afraid to try.
Good article, thanks . I agree that in order to do a plug change, you really should understand the torque settings required for the application. For instance, plugs are typically around 18 - 20ft-lbs, and unless you are very experienced, its hard to feel that out just doing it by hand.
I agree with the antiseize. I think the source of this recommendation is because of the heat cycles in the 911 engines, and some people had problems taking out plugs that had been through many cycles...and had bonded to the heads. Proper plug changes at the correct intervals should correct that.
Good reference materials (shop manuals, web forums, reference wiki's) are abundant these days, so it makes it easier to get the information you need.
Myself, I am the only guy who touches my cars, and have done everything from light bulb changes to crank-up 911 engine rebuilds...and I get a kick out of coaching others to take on their own maintenance. Been doing that for the last 17+ years. There is nothing magical about working on Porsches ; they are well engineered cars that can be taken care of by the shade-tree mechanic with some advice, solid tools and free information.
Cheers,
Mike
when changing spark plugs it's a good idea to clean around the plugs before they are removed. this limits the possibility of foreign matter from falling in to the combustion chamber.
I have an '05 Cayenne S. The Porsche mechanic who changed the plugs at 80K noted that the change is difficult and requires removal of some engine manifold components. Porsche recently refunded their charges on the plug change due to defective coils. The problem with the original coils have been fixed by Porsche. The refund was a nice surprise........duh!
Tip on disconnecting electrical connectors: Gently press the two pieces together first. Then, push in the locking button. Then pull the plug from the socket while holding in the locking button. Pushing the connector together releases pressure the locking feature making removal much easier. Try to work on your car in warm weather only or in a heated garage. Old, frozen plastic parts break.
What are the names of the ignition coil clips, I broke one of mine also. I cant find them anywhere.
Just google the part number. Your local VW dealer should have one.
Any idea what the part number might be? Ive called my local Porsche and VW. I have explained what I'm wanting, and porsche are a bunch of morons. VW couldnt patch me through. I'm doing this all from overseas so its a PITA. Thanks for the help.
Sorry, no. However, it's clearly labeled on the clip itself (the picture above isn't very clear or we could just take it off that). For instance, the part above it is VW 022 971 921. Most likely you could call and tell them that it is the part just below that one. Look at the pictures on this post to explain it to them and point them to this post if you need to. Here's a link to someone that has the other portion of the coil cap. http://www.quirkparts.com/oe-volkswagen/022971921
Thank you so much, I appreciate this
Hi
Very useful tips. Thank you all. Just a quick question. How do you remove the broken part from the coil. I don't have the clip anymore to pull out the wire.
Thanks
Zubair
Is yours broken? If not, you could probably fashion your own clip out of a wire coat hanger...