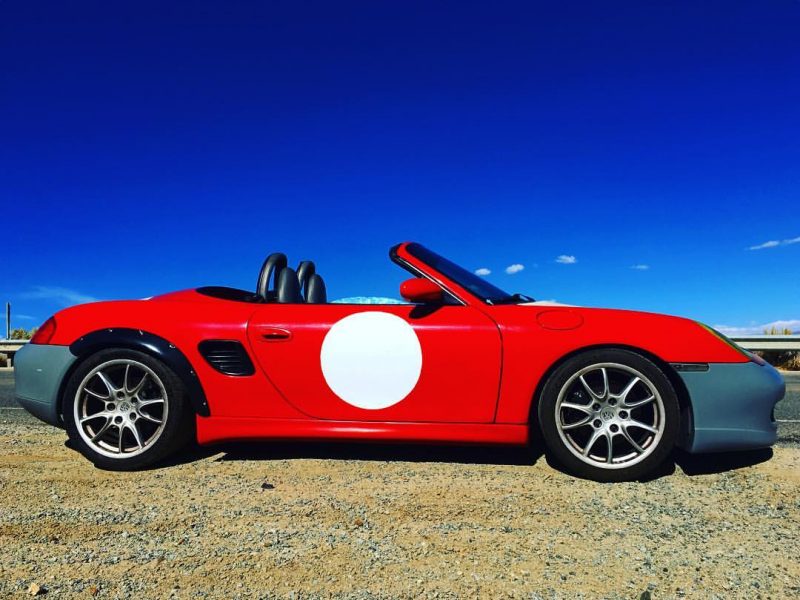
We’ve been wrenching on “Project Boxster Clubsport” for quite a while now, and it just keeps getting better. We purchased the Porsche for a song, and have been slowly making some moves to drop the car’s weight and add a little more fun. So far, we’re really happy with what the Boxster has become, even though the motion of the project has been halted and restarted in new directions a couple of times now. It’s an excellent Porsche, and we aim to make it just a little bit more excellent with each improvement.
Part 2 – GT3-Style Center Console Delete
Part 3 – LED license plate lights
Part 6 – Emblem Delete and Paint Correction
Part 8 – Short Shift Kit Installation
Part 10 – Big Brakes, Spacers, and Wheel Studs
Part 11 – Wheels and Michelins
Part 14 – Interior Door Handle Update
Part 18 – H&R Sport Spring Installation
Part 19 – Adjustable Rear Toe Control Arms
Before we get started we would need to thank Michelin. As many of you know, Michelin is a long-time sponsor of FLATSIXES.com. Recently, they have generously offered to sponsor Project Boxster Clubsport as part of their involvement with our site. Please consider checking out what Michelin has to offer by clicking their banners on this page. Without Michelin’s support, and others like them, this site really wouldn’t be possible.
Part 20 – Rear Suspension Bracing
The 1997 ‘986’ Porsche Boxster is notoriously underbraced at the rear subframe. Porsche issued a technical bulletin regarding the use of 18″ wheels on 1997 model year cars, stating that it was inadvisable because of the changes made in 1998. We’ve been using 18″ GT3-spec wheels for over a year against Porsche’s advisement, we’ve been lucky thus far, but figured it was time to address this potential issue. Preventing a stress fracture from cropping up seemed important. Rear lower and upper strut braces were ordered up.
Step 1 – Installing The Rear Upper Strut Brace
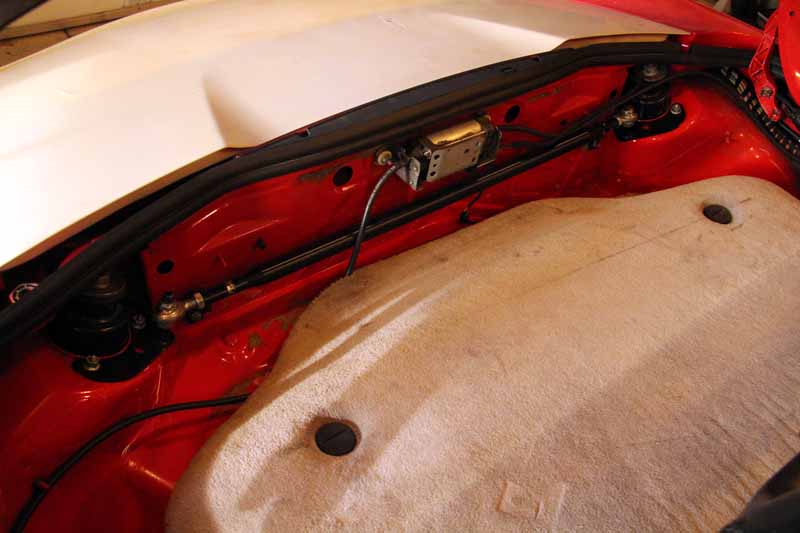
As I was cruising eBay one night I found a rear upper strut brace for 986 Boxster that was taken from a wrecked Boxster. This car died so that ours could live a more full life. After clicking the “Buy-it-now” button, waiting about a week, and receiving the part, I was pleasantly surprised that it was from a reputable manufacturer. This is a now-discontinued Evolution Motorsports rear brace, and it seems to be of a reasonably good quality. Perfect!
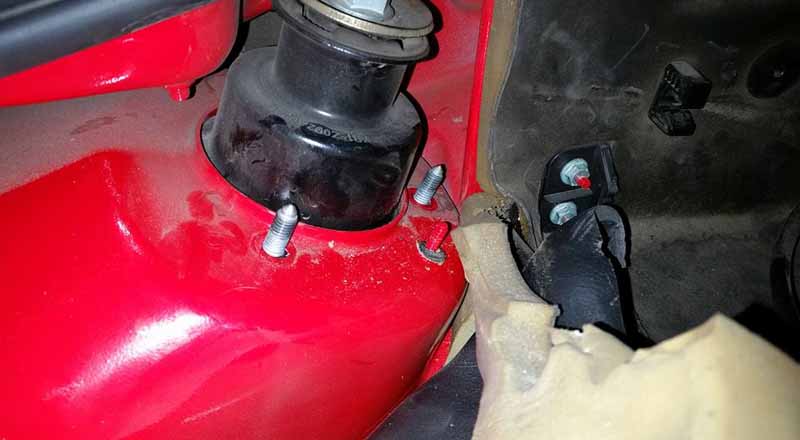
Start by putting your Boxster’s top into ‘service mode’ to allow acces to the rear suspension. After peeling back a few layers of insulation (which we later decided to remove altogether), you can see that there are two forward studs to the rear strut, while the third nut is obscured in this photo by the strut top itself. You don’t need to remove the third nut, just the front two for this project. There is also a little red stud that helps hold down that insulation.
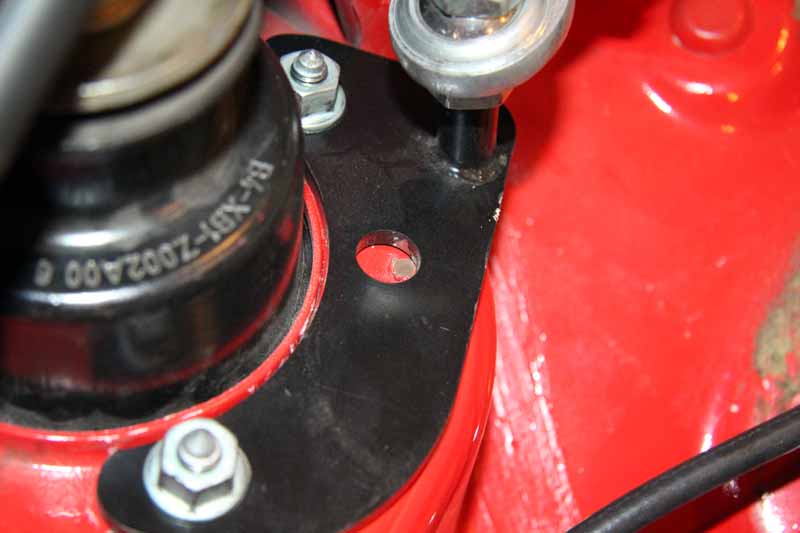
The mounting plate is bolted directly to the rear strut by sliding it over the retaining studs and re-using the original nuts. Then you can adjust the brace bar to the proper length between the two uprights. While there is a hole in the brace’s attachment plate for the insulation retaining stud, we just couldn’t get ours to align properly to allow the stud through the hole. As such, we used a dremel to nip that little piece off of the strut housing (shown above).

For the initial fitment, keep everything loose until all of the pieces are in place, then tighten everything down once it’s all situated. It takes a few minutes of finagling, but once together you’ll have a stronger connection between the two sides of the rear suspension. There are a few pieces that can interfere with the bar’s placement, so make sure your convertible top drive cables are not in the way.
Step 2 – Installing The Rear Lower Subframe Brace
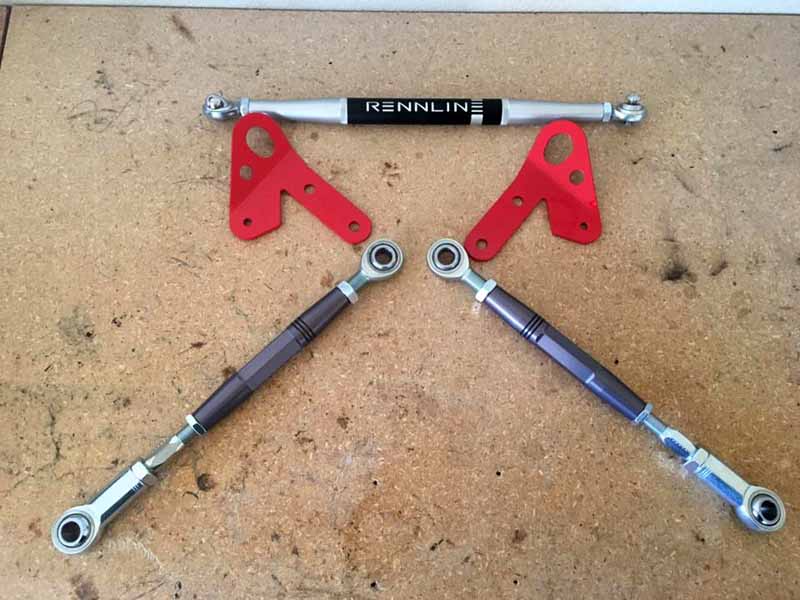
While a rear upper strut brace is nice, adding a lower subframe brace just adds another level of peace of mind. When we called Rennline to get our rear toe control arms, we also purchased a rear lower brace, which includes their rear tie-downs as well. It’s another nice product from Rennline and I’m pretty happy with it for the price. This is certainly beefed up enough to help provide structural bracing, and the heim jointed ends are a nice touch.
This installation is pretty straightforward. You begin by installing the rear suspension tie-downs, which does involve at least loosening the factory aluminum subframe braces. Once that is done, you can bolt all of that back up to the car, and work on connecting the two sides of the suspension subframe with the new Rennline bar. This is a turnbuckle piece, so it adjusts easily, and then you can tighten it down when it’s all set up. Easy as pie.
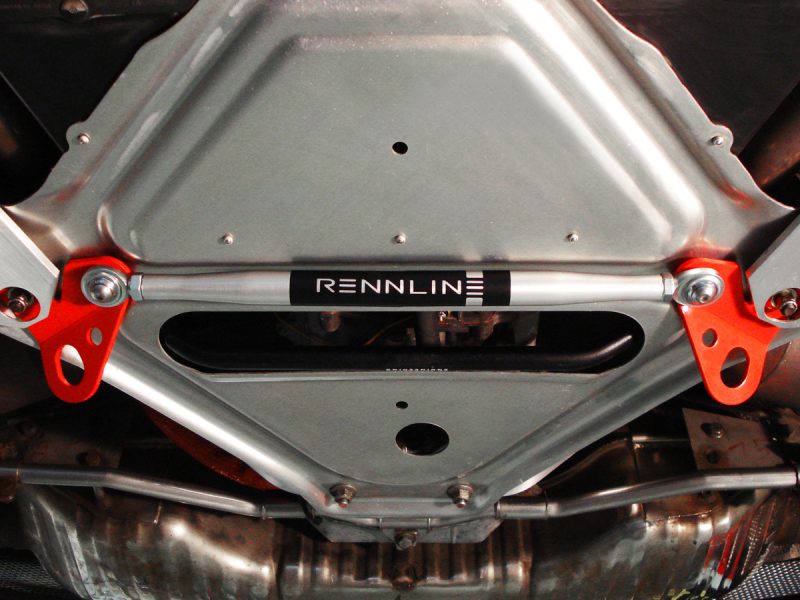
While you won’t likely notice much of a difference in the driving experience with these braces installed, there are some improvements that extend beyond mitigating potential damage. With a stronger base, the suspension can now operate with less deflection and deformation.
Rear Suspension Brace Installation Costs
Evolution Motorsports Rear Upper Suspension Brace – $82.50 (Used – eBay)
Rennline Rear Lower Subframe Brace – $185.00 (New – Rennline.com)
[Rear lower subframe brace photo sourced from Rennline.com]
