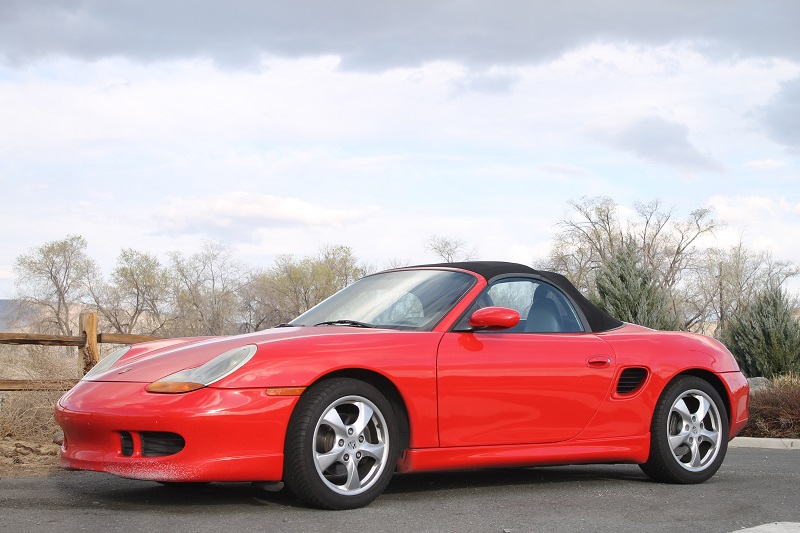
Last year we introduced you to our newest project car, called simply “Project Boxster Clubsport”. In that first installment we found the right car, we purchased it for a song, and it was sitting politely in our garage waiting for its first modifications. So far, the Boxster has been happy to simply rack up the miles and keep things rocking along. It’s an excellent Porsche, and we aim to make it just a little bit more excellent with each improvement.
Part 2 – GT3-Style Center Console Delete
Part 3 – LED license plate lights
Part 6 – Emblem Delete and Paint Correction
Part 8 – Short Shift Kit Installation
Before we get started we would need to thank Michelin. As many of you know, Michelin is a long-time sponsor of FLATSIXES.com. Recently, they have generously offered to sponsor Project Boxster Clubsport as part of their involvement with our site. Please consider checking out what Michelin has to offer by clicking their banners on this page. Without Michelin’s support, and others like them, this site really wouldn’t be possible.
Part 10
We’ve hardly been keeping it a secret, but Project Boxster Clubsport has some shiny new wheels and some sticky new Michelins coming down the pipeline (more on that in the next installment). As such, we’ve got to get a few things sorted out to make sure everything looks ship shape when they get fitted up. Larger brakes from a 2008 Cayman S (all Boxster and Cayman models use the same caliper mounting, so any parts from any year can be fitted. I chose these because they were a good deal.) plus some stainless reinforced brake hoses, brand new Hawk HPS pads, and some properly sized wheel spacers.
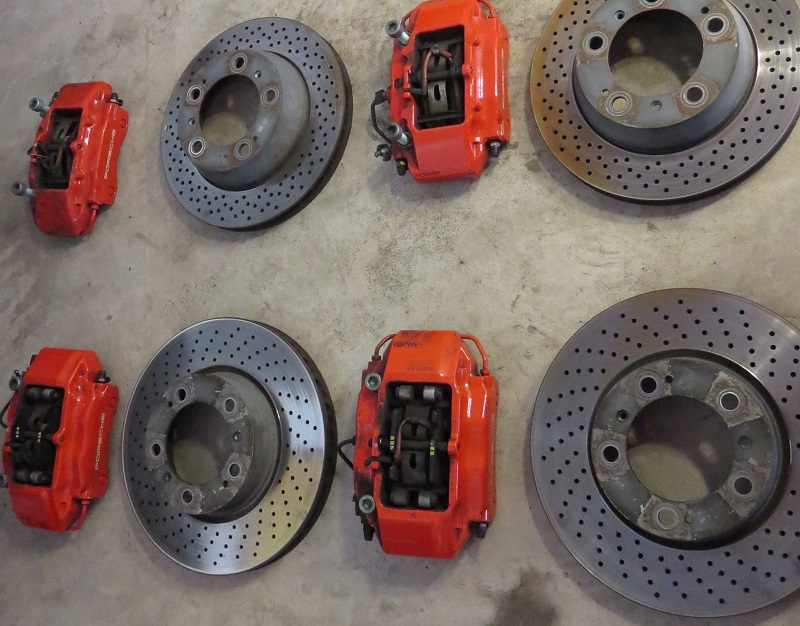
The starting point for this project came a few weeks before when my wife told me that she’d like to plan an impromptu trip to San Francisco (as so often happens). When my wife says “Let’s take a weekend and go to San Francisco” what I hear is “Hey, you should check SFBay.Craigslist.org to see if there are any good deals on Porsche parts right now.” As luck would have it, a Cayman S owner had recently installed the Brembo Gran Turismo Brake Upgrade Kit and all of his stock take-off calipers and rotors were for sale. These components were alleged to only have 30,000 miles on them, and the price was right. Calipers, Rotors, and Pads for $500 picked up. That’s a deal of a lifetime. I’d been passively looking into an upgrade like this since we bought the car, and usually Boxster/Cayman S calipers are $200-$300 dollars each. When I picked them up, I inspected everything and even the rotors looked almost like new.
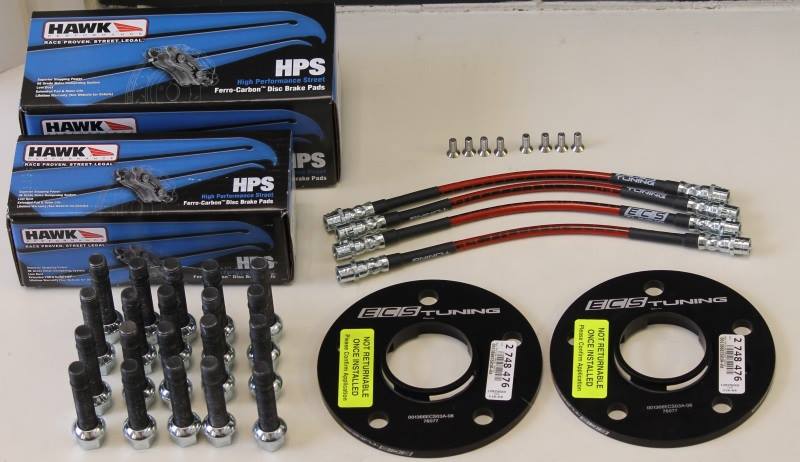
Everything outside of the calipers and rotors was sourced through ECSTuning.com. We got a full set of extended lug studs, a set of stainless steel reinforced hoses, new Hawk HPS pads, 8mm spacers for the front, 12mm spacers for the rear, and a set of stainless steel brake rotor screws. The Hawks are self-explanatory, there’s hardly a better street pad out there than the HPS. I’ve tried more aggressive pads and they dust like crazy (the paint of our Boxster still has Hawk Blue dust embedded in it), and I’ve tried less aggressive pads and they fall on their face under pressure. The HPS is really the ‘Just Right’ Goldilocks option for an aggressive street car like our Project Clubsport. The ECS branded components are made of quality materials, have professional finishes, and have just a few finishing touches that make them just right for our project.
Step 1: Out With The Old
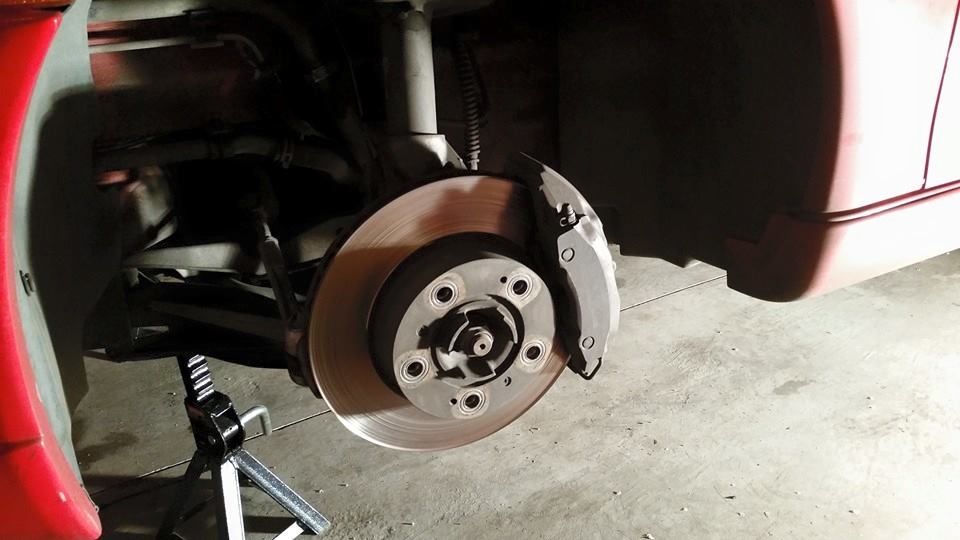
The stock stuff is already pretty good, but when something better comes along for only a few hundred dollars, you can’t not go for it. Calipers are held on with two bolts each, undo the hoses at the source, take the rotor screws off, and everything comes right off. It helps that this car has lived its entire life on the salt-free roads of the West, because there isn’t any corrosion on any of the screws or bolts. Back when we were living in Ohio, everything was rusty and this job would have taken twice as long.
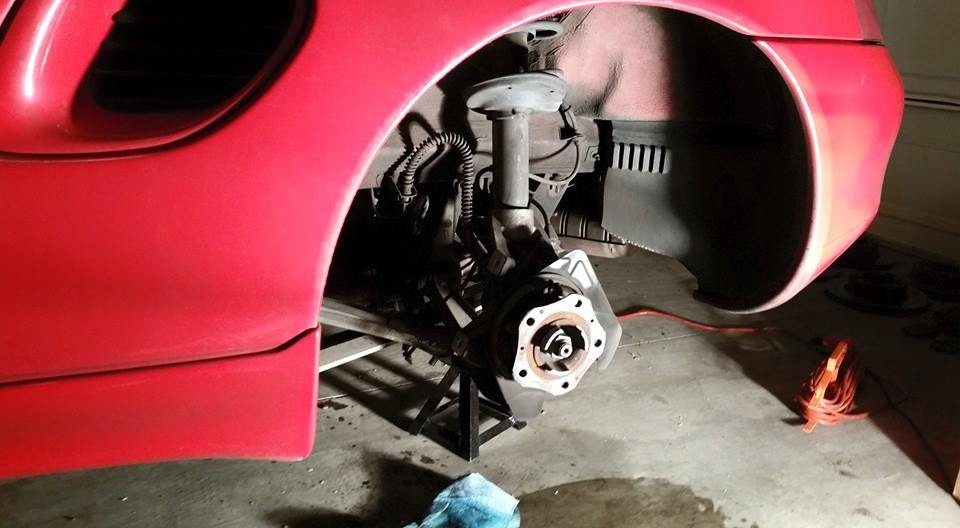
All of the old stuff was getting a little worn anyway. The rotors had some pretty significant grooving and had lips developing at the outer edge on all four rotors. The pads weren’t in bad shape, but they were wrong for our purposes. Plenty of life remaining, so they got bagged and tagged for potential future use. The rotors will get scrapped, and the calipers will be sold on to someone who needs them.
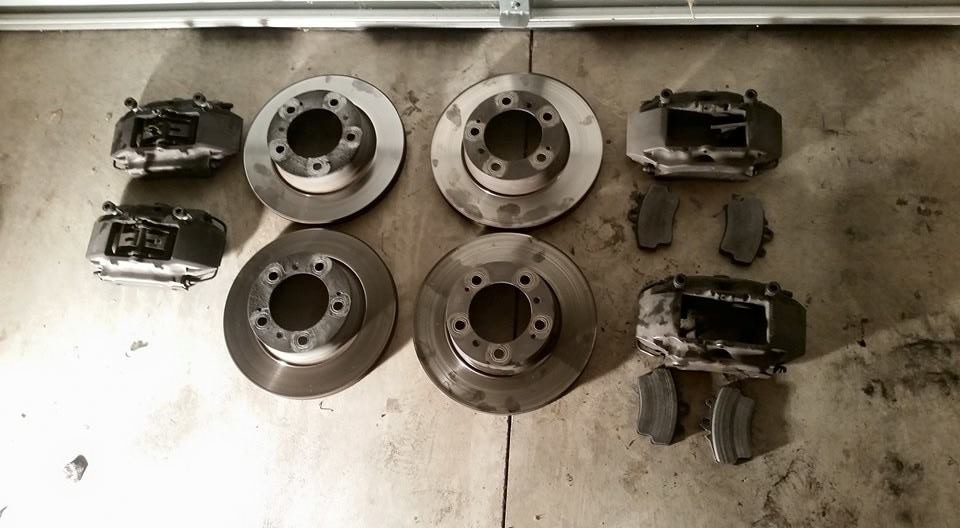
Step 2: In With The New

The paint on the Cayman S calipers is, obviously, red. The stock calipers on our base Boxster were black. Our aim with this project is to keep it looking at least somewhat like stock. The red paint was chipped in areas, and they needed a repaint anyhow, so some black caliper paint was sourced and we went to town. Cayman S rear rotors use a larger parking brake shoe and assembly, so some parts needed to be sourced there and installed to retain parking brake function. From there, everything was pretty easy to install. Swap out the hoses, install the new rotors, and bolt on the new calipers. Obviously a proper bleed is important for something like this, so we purchased a Mity-Vac kit from Amazon to make things easier and drama free. ATE Typ 200 fluid is my preference, as it is the same as the old Super Blue fluid, but with a yellow color instead of blue dye (which has been outlawed in the US for some dumb reason).

The new lug stud conversion kit is as simple as can be. An Allen key is all it takes to install them, because you just thread them in like your stock wheel bolts, and then tighten them a bit into the hub. As the car originally came with wheel bolts from the factory, installing wheels isn’t always the simplest thing to do, especially when swapping out to a wider and larger diameter wheel. Wheel studs allow you to hang the wheel on the hub before tightening down the lug nut. It’s a simple change, but a welcome one when needed. These wheel studs are also a bit longer than the stock wheel bolt, which allows us to run spacers without running into any issues with thread engagement. I like this kit, but I would have preferred that it come with black lug nuts instead of chrome. I might get some black open ended (ball seat) lug nuts at a later date to correct that.
With the rotors installed, line up the spacers and crank them down with the new stainless rotor screws. And there you have it. The project is over. Toss your new wheels on (You’ll see them in the next installment. They look great!) make sure they’re properly torqued, and go for a drive. This whole project from start to finish probably only took a few hours.

Step 3: Keep Your Cool
While we were installing all of this stuff, we took a moment to look at our stock front brake ducts. They were in a poor state.
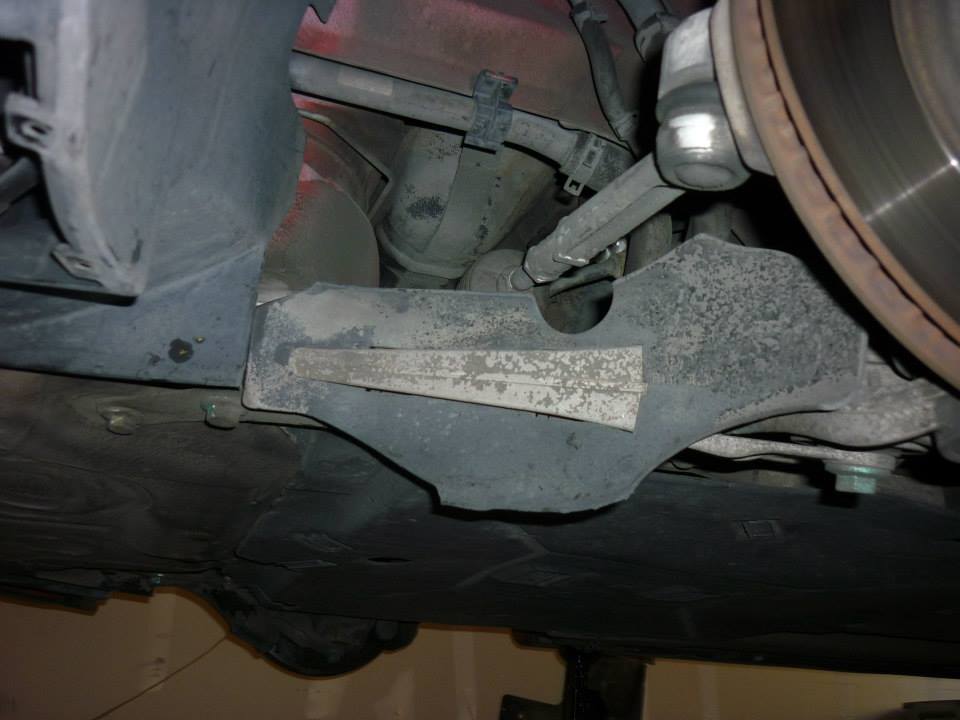
These probably didn’t do all that much work when they were new. The stock boxster air deflectors don’t stick down very far into the air stream, and they don’t have nearly the scoop that other Porsche models offer. Luckily, with parts sharing, every front suspension bit that fits a 996 bolts right on to a 986. Checking the various catalogs, we found a set of GT3 brake ducts that would do the trick for not very much cash outlay. You can also go with GT2 brake ducts, but they stick down very far and may cause some clearance issues with collecting road debris, not to mention that they are significantly more expensive than the GT3 versions.
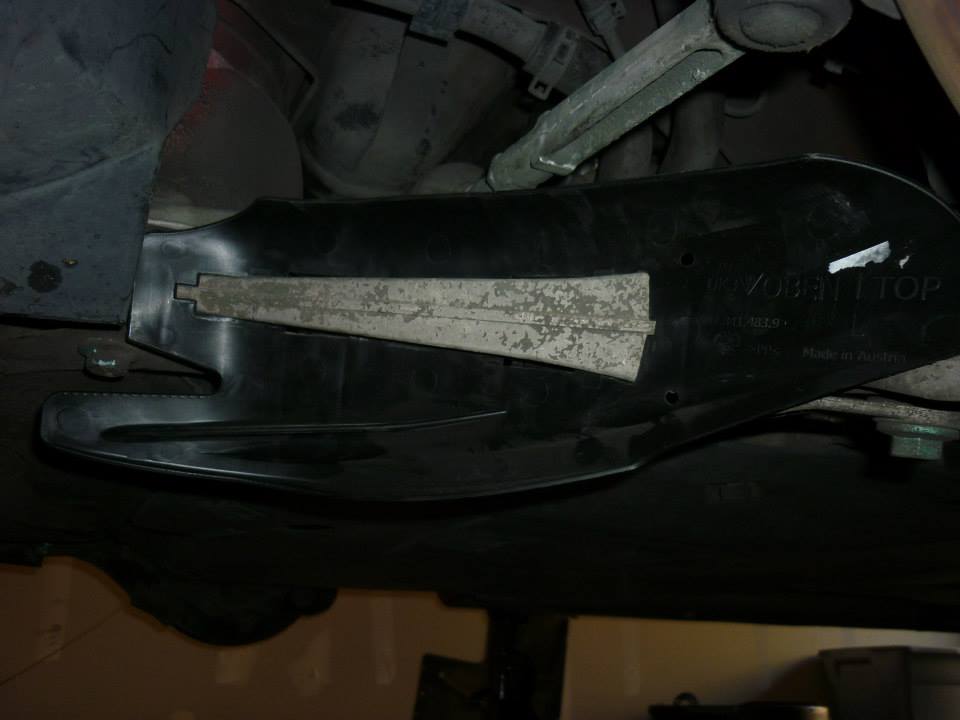
There’s not even any hardware keeping these on. They have plastic clips that hold them on around the lower arm, as pictured. Installation was, literally, a snap.
Brake Upgrade Project Costs
Calipers and Rotors – $500 (SFBay Craigslist)
Front Brake Pads (HB664F.634) – $180.57 (ECS Tuning)
Rear Brake Pads (HB290F.583) – $145.28 (ECS Tuning)
Rotor Screws (Qty. 8) – $11.92 (ECS Tuning)
Stainless Reinforced Brake Hoses – $124.95 (ECS Tuning)
Lug Stud Conversion Kit – $159.90 (ECS Tuning)
Spacers:
8mm Front Spacers – $85.95 (ECS Tuning)
12mm Rear Spacers – $99.95 (ECS Tuning)
Parking Brake Components:
Parking Brake Shoe Set (Textar) – $84.27 (ECS Tuning)
Brake Shoe Adjusting Screw (Qty. 2) – $12.16 (ECS Tuning)
Brake Shoe Tension Spring Upper (Qty. 2) – $13.46 (ECS Tuning)
Brake Shoe Tension Spring Lower (Qty. 2) – $43.20 (ECS Tuning)
Brake Shoe Keeper Spring (Qty. 4) – $103.40 (ECS Tuning)
GT3 Front Brake Ducts:
Left Side (99734148392) – $7.89 (Stoddard NLA LLC)
Right Side (99734148492) – $7.89 (Stoddard NLA LLC)
Motive Products Power Bleeder For European Cars – $49.46 (Summit Racing)
Magnetic Brake Fluid Catch Can – $17.99 (Amazon)
ATE Typ 200 Brake Fluid (2 Cans) – $35.00 (Amazon)
Total – $1683.24
